Have you noticed unsightly holes in your shower tile grout?
Don’t fret! While these imperfections can diminish the overall look of your shower, they are easily fixable. It’s important to tackle these concerns promptly to prevent more severe issues from developing.
Here’s the silver lining – repairing these holes is a straightforward process!
This comprehensive guide will walk you through a detailed, step-by-step approach to effectively mend holes in your shower tile grout. Additionally, we will delve into the common causes of grout damage and offer preventive strategies to help you avoid similar problems in the future.
Transform Your Shower: A Step-by-Step Guide to Repairing Holes in Tile Grout
Repairing those troublesome grout holes may seem intimidating initially, but it’s actually a simple and satisfying task. Allow me to guide you through the crucial steps that will restore your shower to its pristine condition, enhancing both its appearance and functionality.
#1 Gather Essential Grout Repair Tools for an Efficient Repair Experience
Before diving into your grout repair project, it’s vital to assemble all necessary tools and supplies to ensure the task is carried out smoothly and effectively. Here’s a comprehensive list of items you will need to have on hand:
- Specialized grout removal tools
- Caulk gun
- Grout that matches your existing tile color
- Grout float for seamless application
- A sponge for easy cleanup
- A bucket of water for rinsing
- Masking tape for precise edges
Always prioritize safety by wearing gloves and safety glasses while working. Having all your tools organized and ready will streamline the entire process, making it less overwhelming and more enjoyable.
Also Read: Epoxy Grout VS Cement Grout
#2 Prepare Your Shower Area Thoroughly for a Successful Grout Repair
With your tools gathered, it’s time to ready the area for the repair work. Start by applying masking tape around the grout lines where the holes are located.
This crucial step ensures the new grout stays in place, resulting in a clean and professional finish that enhances the overall look of your shower.
Next, carefully utilize your grout removal tool to extract any old, damaged grout. Be gentle to avoid scratching the tiles, and if you’re working in a shower environment, take care to protect the waterproof membrane beneath the tiles. This preparation is essential, as it creates a clean and stable surface for the new grout to adhere effectively.
Also Read: Why Grout Gets Stained And Damaged
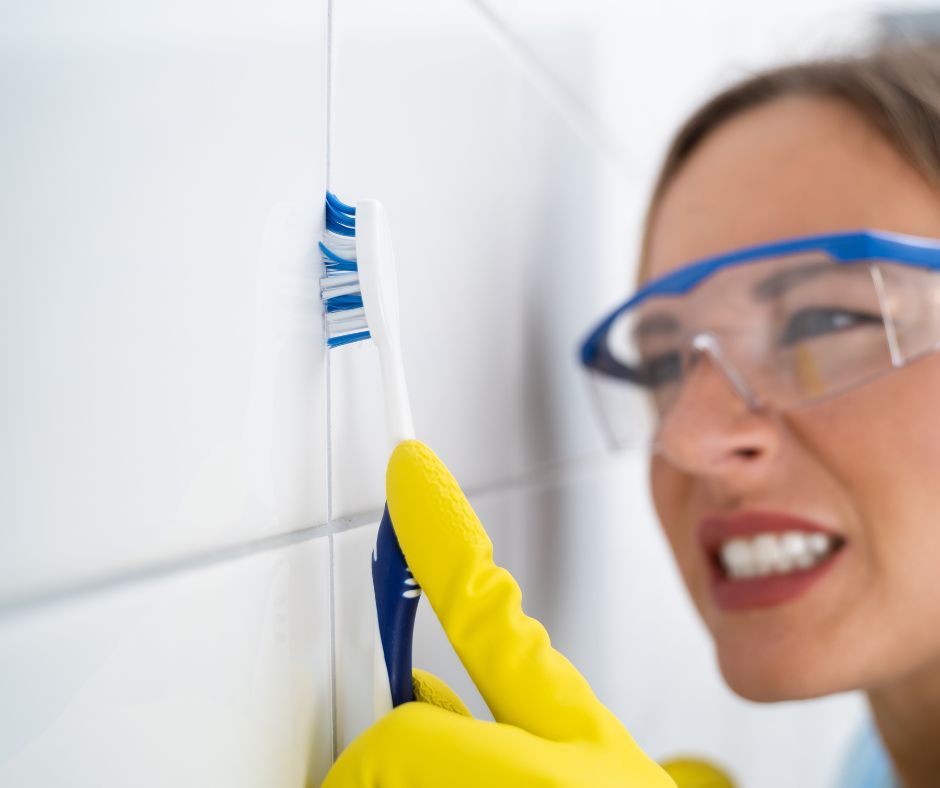
#3 Clean Your Grout Workspace Thoroughly Before Applying New Grout
Once you have removed the old grout, it’s time to clean the workspace meticulously. Use a slightly damp cloth to wipe down the surface, ensuring that all dust and debris from the grout removal process are eliminated.
It’s vital to allow the area to dry completely before applying the new grout; a dry surface significantly improves the adhesion of the new grout, guaranteeing a long-lasting and durable repair.
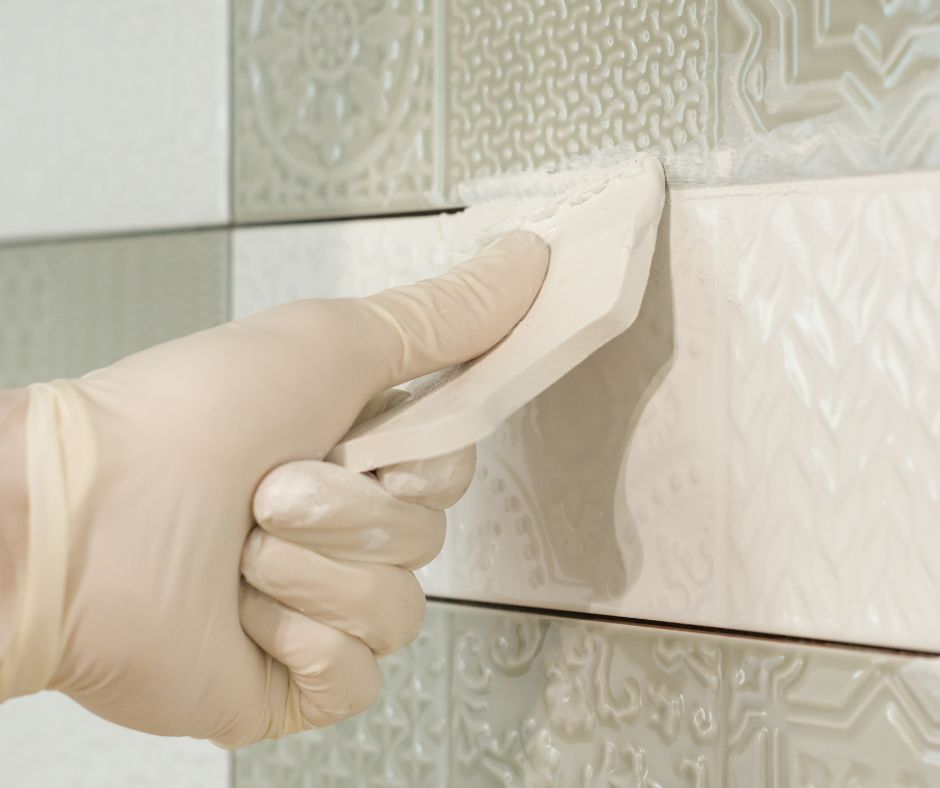
#4 Skillfully Apply New Grout for a Stunning Finish
Now comes the most exciting part of the process! Prepare your grout according to the instructions provided on the packaging.
Aim for the ideal consistency – not too watery and not overly thick. Use your grout float to apply the new grout over the holes, ensuring that you push it in at an angle. This technique is pivotal as it helps to fill all gaps and creates a smooth, even finish that enhances the overall aesthetic.
Once the holes are filled, utilize the float to level the surface and remove any excess grout, ensuring a tidy and professional appearance. Taking the time to apply the grout with precision will make a noticeable difference in the final look of your shower.
#5 Carefully Remove Excess Grout for a Polished and Professional Look
After allowing the grout to set for a short period, take your damp sponge and gently wipe away any excess grout.
Make sure to rinse the sponge frequently to prevent grout from drying on it, as this can complicate the cleaning process. This step requires patience, but the effort invested to achieve a polished, professional appearance will be well worth it. Take your time to ensure everything is perfect before allowing it to dry completely and removing the masking tape.
Also Read: Regrouting Your Bathroom Grout
#6 Optional: Apply Grout Sealer to Enhance Longevity and Durability
If you’re looking to optimize the lifespan of your grout, consider applying a grout sealer.
While this step isn’t mandatory, it provides significant protection against moisture and stains, thereby extending the life of your repair. If you choose to seal the grout, be sure to wait a few days for it to fully cure before applying the sealer.
Follow the manufacturer’s instructions for the best results, and you will add an extra layer of protection that keeps your grout looking fresh and vibrant for many years to come.
Understand the Causes of Grout Damage and Implement Effective Prevention Strategies
Have you ever taken a moment to consider what leads to those unsightly holes in your grout in the first place?
The primary offenders are typically moisture and aggressive cleaning techniques. Grout is naturally porous and can deteriorate over time, especially if it isn’t adequately sealed. Furthermore, showers are constantly exposed to water and frequent cleaning, which can exacerbate the problem.
Additionally, natural settling of the house can lead to minor shifts that create cracks or holes in the grout.
To prevent future holes from forming, consider sealing your grout after installation or repair.
Using gentle cleaning products can also extend the life of your grout. Avoid harsh chemicals that can degrade grout over time.
Regularly inspecting your shower grout for any signs of damage is also beneficial.
Addressing any issues as soon as they arise will help prevent them from escalating into more significant problems.
Essential Tips for Achieving Successful Grout Repair
Repairing holes in your shower tile grout is entirely feasible on your own, and doing so can prevent more significant, costly issues from arising in the future.
However, if you prefer to have professionals handle this task, we are here to assist. Our team can efficiently complete the regrouting process, relieving you of the hassle.
Regardless of your choice – addressing those holes will help maintain your shower’s functionality and aesthetic appeal for years to come!
What Actions Should You Take If Your Contractor Left Holes in Your Grout?
If you’ve recently had renovations done in your bathroom and discovered holes in the grout, it’s crucial to contact your contractor without delay. A reputable professional should ensure that no holes or imperfections remain in the grout.
Most reliable contractors will be more than willing to return and rectify these issues promptly.
How to Efficiently Repair Pin Holes in Grout?
To address pin holes in the grout, start by cleaning the area thoroughly and lightly dampening the surrounding grout. Next, press a small amount of grout into the holes, smoothing the patched area with your finger for a seamless finish that blends perfectly with the existing grout.
What’s the Correct Method for Repairing Missing Grout in the Shower?
Fixing missing grout is quite similar to repairing holes. Begin by ensuring the area is thoroughly cleaned, then apply new grout to the affected spots. Use your grout float to smooth it out, ensuring a level and even finish. Finally, remove any excess grout and allow it to dry completely for optimal results.

The Article: Holes in Shower Tile Grout? Effective Solutions Inside! first appeared on https://writebuff.com.
The Article Effective Solutions for Holes in Shower Tile Grout Was Found On https://limitsofstrategy.com


I can completely relate to the frustration of dealing with unsightly grout holes in the shower. It’s amazing how something so small can disrupt the entire aesthetic of the space. I recently went through a similar situation and found that the repair process was not only straightforward but also surprisingly satisfying. It felt good to restore that little area and make a noticeable difference—just like giving your shower a mini makeover!
I get what you’re saying—grout holes can feel like little gremlins lurking in a perfectly good shower. It’s like they conspire to steal the vibe of a relaxing soak. And you’re right about the satisfaction of fixing them; it’s like being the superhero of your own bathroom saga.