Elevate Your Barbecue Skills by Selecting the Perfect Smoker Temperature Gauge
Explore the Different Types of Smoker Temperature Gauges Available in the Market
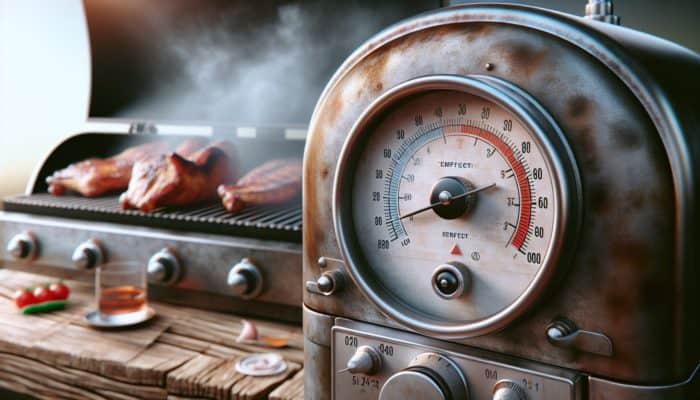
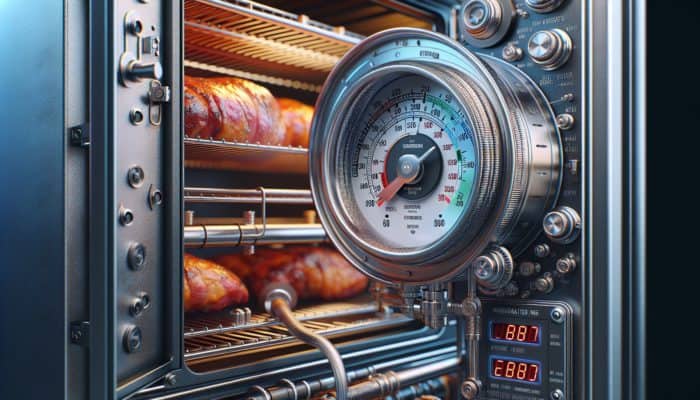
Selecting the appropriate smoker temperature gauge is absolutely essential for passionate barbecue aficionados who are eager to enhance their grilling proficiency. In the U.S. market, you’ll primarily find two predominant types: analog and digital gauges. Analog gauges utilize a dial mechanism with a needle that accurately indicates temperature levels. Many barbecue enthusiasts prefer analog gauges because of their straightforward design and consistent performance, particularly in traditional setups. These gauges typically function without batteries and can endure high heat, making them a favored choice among purists who cherish classic barbecue techniques.
Conversely, digital gauges have gained immense popularity due to their superior accuracy and often feature backlit displays that enhance visibility in different lighting conditions. A wide variety of digital models come equipped with additional functionalities such as timers and alarms, which are incredibly advantageous for effectively managing cooking durations. Some premium digital options even allow mobile device connectivity, enabling you to monitor temperature remotely—an invaluable benefit during extended smoking sessions.
Your decision between an analog and a digital gauge ultimately hinges on your individual preferences and smoking methods. If you appreciate simplicity and reliability, an analog gauge might be your best fit; on the other hand, if you crave advanced features and unmatched accuracy, investing in a digital gauge can greatly elevate your smoking journey.
Dive into the Experience and Listen to Expert Insights
Key Features to Consider When Choosing Your Smoker Temperature Gauge
When it comes to selecting a smoker temperature gauge, several critical features can significantly enhance your overall cooking experience. Accuracy stands out as the primary factor; your gauge should deliver real-time readings that accurately reflect the internal conditions of your smoker. An exemplary gauge will maintain a tolerance of less than five degrees Fahrenheit, ensuring that your meats consistently achieve the perfect doneness.
Durability is another vital consideration, particularly for smokers that frequently encounter high temperatures and outdoor elements. Opt for gauges made from stainless steel or other heat-resistant materials to prevent wear and tear over time. Ease of reading is equally crucial; look for gauges with large, clear dials or displays that are easily readable from a distance. If you often cook in low-light conditions, consider models equipped with illuminated screens or clearly marked indicators to enhance visibility.
Lastly, seek out additional features such as wireless connectivity, temperature threshold alerts, and programmable settings that can greatly boost convenience, especially during prolonged smoking sessions. By prioritizing these essential attributes, you can choose a smoker temperature gauge that perfectly aligns with your unique needs and enriches your overall barbecue experience.
Where to Find the Best Smoker Temperature Gauges for Purchase
In the United States, smoker temperature gauges are readily available at numerous retailers, catering to a diverse range of preferences and budget considerations. Local hardware stores can serve as an excellent starting point, providing a selection of gauges that you can assess in person. This hands-on experience is particularly beneficial for those who appreciate the chance to ask questions and gain insights from knowledgeable staff members.
For an even broader selection, online retailers such as Amazon and Walmart boast extensive inventories of gauges, ranging from budget-friendly options to high-end models. Shopping online not only allows you to read customer reviews and compare prices but often leads to better deals and special promotions.
Moreover, specialty barbecue shops represent a fantastic option, offering gauges specifically designed for smoking and grilling. These establishments typically stock high-quality, professional-grade instruments and can provide expert recommendations on the best gauge tailored to your specific smoker.
Whether you decide to shop online or visit a physical store, ensure you evaluate vital factors such as warranty and return policies, as these can provide invaluable peace of mind regarding your purchase.
Comprehensive Instructions for Installing and Calibrating Your Smoker Temperature Gauge
Proper installation and calibration of your smoker temperature gauge are essential for achieving accurate readings and enhancing your overall smoking experience. Begin by selecting the optimal location on your smoker, ideally positioned at the level of the cooking chamber, as this placement will ensure that the gauge accurately reflects the actual temperature where the meat is cooked. This strategic positioning is vital for obtaining precise temperature readings, which is key to achieving optimal cooking results.
Once you have identified the ideal location, meticulously adhere to the installation instructions that accompany your gauge. Equally important is regular calibration. Without proper calibration, the temperature readings may be misleading, potentially leading to overcooked or undercooked meats that do not meet your culinary aspirations.
To calibrate your gauge, use a secondary thermometer to compare readings. Adjust the gauge according to the manufacturer’s instructions until both thermometers align at the same temperature. It is advisable to perform this calibration at least once per season or after significant temperature variations in your cooking environment.
By ensuring both proper installation and calibration, you will not only enjoy a more precise smoking process but also enhance your cooking outcomes, making each barbecue session a triumphant success.
Preparing Your Smoker for Gauge Installation: Essential Steps to Follow
Crucial Safety Measures to Implement Before Installation
Before you begin the installation of your smoker temperature gauge, it is paramount to prioritize safety to avoid potential accidents. Always ensure that your smoker has completely cooled down and, if applicable, is unplugged. Working with a hot smoker poses significant burn risks and other injuries, underscoring the importance of patience during this process.
If your smoker has recently been used, allow it to cool down for at least 30 minutes to an hour. This waiting period is not only vital for your safety but also helps avert mishaps during installation. Additionally, make sure that the area around the smoker is clear of any flammable materials, including paper towels, grilling tools, and wood piles, as these could pose hazards.
Finally, wear appropriate protective gear, such as gloves and safety glasses, particularly when using power tools during installation. Implementing these straightforward yet effective safety precautions will facilitate a seamless installation process without any unpleasant surprises.
Essential Tools for a Successful Installation

Installing a smoker temperature gauge requires only a few common tools, most of which can be acquired from your local hardware store. The primary tool needed is a drill, which you will use to create a hole in your smoker for the gauge. Ensure you have the correct drill bit size that corresponds with the gauge’s stem diameter for a proper fit.
You will also need screws and a screwdriver to secure the gauge to your smoker. If your gauge includes a mounting bracket, check whether additional hardware is required for installation. A small wrench or pliers may also be useful, especially if your gauge features nuts that require tightening.
Lastly, having a measuring tape or ruler handy can assist you in pinpointing the precise installation location, ensuring accurate placement. By gathering these tools in advance, you will streamline the installation process and enhance your chances of success.
Cleaning and Preparing the Smoker Surface for Installation
Before you proceed with installing your smoker temperature gauge, it’s crucial to thoroughly clean and prepare the installation surface. This step is vital for ensuring a secure fit and accurate temperature readings. Begin by using a soft cloth or sponge to wipe down the area where you plan to install the gauge. Remove any grease, soot, or debris that may have accumulated from previous grilling sessions, as these can interfere with the gauge’s performance.
If your smoker has a painted or coated surface, exercise caution not to scrub too vigorously, as this could damage the finish. Instead, utilize a mild detergent mixed with warm water to gently clean the surface. Rinse thoroughly and allow it to dry completely before proceeding with the installation.
Additionally, inspect the designated area for any rust or corrosion that could hinder the gauge’s installation. If you discover any issues, take the necessary steps to address them using appropriate rust treatment products. Ensuring a clean and well-prepared surface will facilitate an easy installation and help maintain the longevity of your smoker temperature gauge.
A Comprehensive Step-by-Step Guide to Installing Your Smoker Temperature Gauge
Identifying and Marking the Optimal Installation Location
Choosing the perfect spot for your smoker temperature gauge is essential for achieving accurate readings. Begin by selecting a location on your smoker that provides a clear view of the thermometer while keeping a safe distance from direct heat sources. Typically, the best spot is near the cooking chamber, where the gauge can effectively monitor the temperature.
Once you’ve chosen the location, use a pencil or marker to clearly mark the spot. Ensure the marking is at a suitable height for easy visibility without requiring you to bend down or strain. For optimal results, utilize a measuring tape to ensure symmetry and alignment with any other gauges on your smoker.
It’s advisable to step back and visually assess the marking before proceeding to drill. This final check guarantees that the gauge’s placement will not obstruct any cooking processes or lids on your smoker. Taking the time to mark accurately will lay the groundwork for a smooth and successful installation.
Drilling the Hole for Gauge Installation
With your installation spot marked, it’s time to drill the hole for your smoker temperature gauge. Selecting the correct drill bit size is essential; it should match the diameter of the gauge’s stem for a snug fit. Using the wrong size can complicate securing the gauge, ultimately leading to inaccurate readings.
Position your drill perpendicular to the smoker’s surface to create a straight hole. Start at a slow speed to avoid damaging the smoker’s material, then gradually increase the speed as you drill through. Clear any metal shavings or debris as you go to maintain a tidy work area.
After drilling through the surface, double-check the size and cleanliness of the hole. It should allow the gauge to fit securely without being overly tight, ensuring ease of installation. A well-drilled hole will significantly enhance the gauge’s accuracy and overall longevity.
Securing the Gauge After Installation
Once you have drilled the hole, the next step is to secure the gauge in place. Start by gently inserting the gauge’s stem into the drilled hole. Ensure it fits snugly without requiring excessive force, as this could damage both the gauge and the smoker.
After the gauge is inserted, use the screws or nuts provided to properly secure it in place. You may need a small wrench or screwdriver to tighten these components adequately. Exercise caution not to over-tighten, as this can lead to damage or misalignment of the gauge.
Once secured, take a step back and visually inspect the gauge to confirm it is level and positioned correctly for optimal reading. The gauge should be easily visible from a comfortable distance, allowing you to monitor your smoker’s temperature without hassle. Proper installation is critical for maintaining accurate readings, making this final step essential for a successful smoker setup.
Professional Recommendations for Installing a Smoker Temperature Gauge
Success Stories from Gauge Installations Across the Nation
Across the United States, barbecue enthusiasts have substantially improved their smoking experiences by successfully installing temperature gauges. For example, in Texas, a dedicated pitmaster opted for a digital gauge on his offset smoker, enabling him to maintain the ideal temperature for brisket throughout the lengthy smoking process. This installation not only contributed to his award-winning recipes but also allowed him to monitor temperatures from the comfort of his home via a smartphone app.
In Colorado, a competitive barbecue team selected an analog gauge for their vertical smoker. They appreciated the simplicity of the gauge, which required no batteries and provided reliable readings even at high altitudes, where temperature fluctuations can be more pronounced. Their choice paid off during competitions, as they consistently produced perfectly smoked ribs that impressed the judges.
In Florida, a family successfully installed multiple gauges on their smoker, allowing them to monitor various cooking zones. This approach enabled them to experiment with different smoking techniques, resulting in delicious outcomes and igniting a newfound passion for barbecue. These examples illustrate how diverse installation strategies can lead to successful outcomes across varied smoking environments and preferences.
Effective Steps for Troubleshooting Common Gauge Issues
Even with optimal installations, there may be instances when smoker temperature gauges fail to provide accurate readings. If you find your gauge is not delivering correct readings, start by checking for loose connections. Ensure that the gauge is securely fastened and that there are no gaps between the gauge and the smoker.
If connections appear intact, recalibrating the gauge may be necessary. Use a secondary thermometer to compare readings, and adjust the gauge according to the manufacturer’s instructions to ensure accuracy.
If issues persist, consider implementing the following troubleshooting steps:
- Inspect for damage: Look for cracks or breaks in the gauge that could affect its functionality.
- Check the gauge’s placement: Ensure it’s not positioned too close to direct heat sources.
- Verify the smoker’s temperature: Use a secondary thermometer to confirm that the smoker is reaching the expected temperature.
- Consult the warranty: If the gauge is new and not functioning correctly, check if it’s covered under warranty for replacement.
By following these steps, you can quickly identify and resolve common problems with your smoker temperature gauge, ensuring reliable cooking results every time.
Expert Insights on Optimal Gauge Placement Strategies
The placement of your smoker temperature gauge is crucial for ensuring accurate readings. Experts recommend positioning the gauge at the cooking chamber level to capture the most precise internal temperature while the smoker is in operation. This allows the gauge to accurately reflect the cooking environment, which is essential for maintaining control over the smoking process.
Avoid placing the gauge too close to direct heat sources, as this can lead to consistently higher readings, potentially resulting in overcooked meats. Instead, consider positioning it slightly off-center or even on the opposite side of the heat source to minimize temperature fluctuations and improve accuracy.
Here are some expert tips for optimal gauge placement:
- Position the gauge at the desired level within the cooking chamber for accurate readings.
- Keep the gauge away from direct flames or heat sources.
- Consider multiple gauges for different cooking zones if your smoker design permits.
- Ensure the gauge is visible from your cooking station for easy temperature monitoring.
By strategically placing your smoker temperature gauge, you can enhance your cooking precision and achieve consistently excellent results.
The Importance of Regular Maintenance for Your Gauge’s Longevity
Regular maintenance of your smoker temperature gauge is essential for ensuring its longevity and accuracy. Just as you would not neglect the upkeep of your smoker, your gauge also requires attention to function optimally. Cleaning the gauge frequently keeps it free from grease and soot buildup, which can obstruct readings and diminish performance.
It is advisable to inspect the gauge regularly for any signs of wear or damage. Look for cracks in the glass face, corrosion on the body, or any discrepancies in the readings. If you observe any issues, address them promptly to prevent further complications and ensure reliable performance.
Here are some maintenance tips to keep your smoker temperature gauge in top condition:
- Clean with a soft cloth and mild detergent regularly.
- Inspect for signs of rust or damage and replace if necessary.
- Ensure connections remain tight and secure after each use.
- Store the smoker covered to protect the gauge from environmental factors.
By incorporating these maintenance practices into your routine, you will not only extend the life of your smoker temperature gauge but also ensure that your cooking remains consistently excellent, enhancing your overall grilling experience.
Exploring the Different Types of Smoker Temperature Gauges
Understanding the various types of smoker temperature gauges available can help you make an informed decision that best suits your needs. Generally, analog and digital gauges are the most prevalent. Analog gauges are renowned for their durability and simplicity, as they require no batteries and provide consistent readings even in extreme temperatures. They typically feature large dials that are easy to read at a glance, making them ideal for traditional setups.
In contrast, digital gauges offer advanced features such as wireless connectivity and backlit displays, making them user-friendly, especially during nighttime cooking or low-light conditions. Some models can log temperature data over time, providing you with deeper insights into your smoking sessions and allowing for more precise control.
Here’s a quick overview of the different types:
- Analog Gauges: Durable, battery-free, straightforward to use, perfect for traditional setups.
- Digital Gauges: High accuracy, often equipped with additional features such as alarms, making them ideal for tech-savvy users.
- Wireless Gauges: Facilitate remote monitoring, perfect for extended cooking sessions.
- Infrared Gauges: Provide quick surface temperature readings, useful for checking grill hot spots.
By understanding the advantages and drawbacks of each type, you can make a well-informed decision that enhances your smoking experience and achieves the best possible cooking results.
The Crucial Need for Calibrating Your Smoker Temperature Gauge
Understanding the Importance of Calibration for Accurate Readings
Calibration of your smoker temperature gauge is vital for ensuring its accuracy. Accurate readings are crucial in smoking, where maintaining the appropriate temperature can significantly influence the flavor and texture of your meats. A poorly calibrated gauge can lead to overcooked or undercooked food, resulting in disappointing outcomes, even for the most experienced pitmasters.
Calibration helps expose any discrepancies between the gauge’s readings and the actual temperatures, enabling you to make adjustments as needed. Regular calibration also prolongs the life of your gauge by preventing unnecessary strain from incorrect readings, ensuring that it continues to operate optimally for years to come.
To ensure your gauge maintains its accuracy, plan to calibrate it at least once per season or whenever you notice inconsistencies in its readings. Adopting this proactive approach will help guarantee consistent, high-quality smoking results every time you fire up your grill.
A Step-by-Step Guide to Calibrating Your Smoker Temperature Gauge
Calibrating your smoker temperature gauge is a straightforward process that can be accomplished using a separate, reliable thermometer. Begin by placing the secondary thermometer next to the smoker’s gauge, ensuring both instruments are exposed to the same air temperature for accurate comparison.
Next, preheat your smoker to a set temperature, ideally one that you frequently use during smoking sessions. Allow both gauges to stabilize for about 15 to 20 minutes, then compare the readings. If there is a discrepancy, adjust your smoker’s gauge according to the manufacturer’s guidelines, which may involve a simple twist or adjustment of its calibration screw.
If your gauge does not feature a calibration option, take note of the difference and compensate for it during your next smoking session. By following these steps, you can ensure your gauge remains reliable and accurate, resulting in perfectly smoked meats every time you grill.
How Often Should You Calibrate Your Gauge for Optimal Performance?
To maintain the accuracy of your smoker temperature gauge, frequent calibration is advisable. Calibration should ideally occur at least once per season and more often if there are significant temperature fluctuations or after extensive use.
If you’ve recently purchased a new gauge, it’s wise to calibrate it before its initial use. The manufacturer may not perfectly calibrate new gauges, and checking them ensures you start your smoking endeavors on the right foot.
Additionally, if you notice discrepancies in your readings, such as a gauge indicating a much higher or lower temperature than expected based on your smoking experience, it’s time for recalibration. By adhering to these recommendations, you’ll ensure your smoker temperature gauge remains accurate, providing you with dependable readings throughout your barbecue sessions.
Tools You’ll Need for Effective Calibration
Calibrating your smoker temperature gauge does not require an extensive toolkit. However, a few essential tools can ensure a smooth calibration process. First and foremost, you will need a reliable thermometer—this can be either an instant-read thermometer or another type that you trust for accuracy.
Additionally, a small wrench or pliers may be necessary if your gauge has calibration screws that require adjustment. Having a calibration key, if provided by the manufacturer, can also be beneficial and streamline the process.
Finally, a notepad or a digital device for note-taking during calibration can help you keep track of any adjustments made and discrepancies noted. By gathering these tools in advance, you’ll facilitate the calibration process and ensure your gauge delivers precise readings when you’re ready to smoke.
Understanding How a Smoker Temperature Gauge Functions
The Mechanics Behind Temperature Measurement in Smoking
A smoker temperature gauge plays a vital role in measuring the internal temperature of your smoker, which is crucial for maintaining the desired cooking temperature. The mechanism typically involves a probe that senses heat and a dial or digital display that conveys this temperature to the user.
In analog gauges, a bi-metallic strip or thermocouple reacts to heat, causing a needle to move along a calibrated scale. In contrast, digital gauges utilize a sensor to detect temperature changes and convert those readings into a digital format for easier interpretation.
Key components of thermometer mechanisms include:
- Sensing Element: Detects temperature changes within the smoker.
- Display: Presents the temperature readings (dial for analog, screen for digital).
- Calibration Mechanism: Allows for adjustments to ensure accuracy.
- Housing: Protects internal components from the smoker’s environment.
Understanding how these components work together enhances your appreciation of the gauge and aids in troubleshooting any issues that may arise.
The Crucial Role of Temperature in the Smoking Process
Temperature control is fundamental in the smoking process, as it directly impacts the flavor, texture, and safety of your meats. Each type of meat necessitates specific temperature ranges to achieve optimal cooking results, making it essential to maintain consistency throughout the smoking journey.
For example, brisket typically benefits from a low and slow approach, with temperatures ranging between 225°F and 250°F, which allows the connective tissues to break down and results in tender meat. Conversely, poultry needs to reach an internal temperature of 165°F for safety; however, many pitmasters prefer smoking it at slightly higher temperatures for enhanced flavor and texture.
Understanding the importance of temperature also extends to food safety, as cooking meats at safe temperatures helps prevent the risk of foodborne illnesses. By closely monitoring temperatures with your smoker gauge, you can ensure that your smoked dishes turn out delicious and safe for consumption.
Factors Influencing Gauge Accuracy and Reliability
Several factors can impact the accuracy of your smoker temperature gauge, potentially compromising the quality of your smoking results. One of the primary factors is the gauge’s placement. If the gauge is positioned too close to direct heat or flames, it will register higher temperatures, leading to uneven cooking.
Calibration is another critical aspect. A gauge that hasn’t been calibrated regularly can produce readings that deviate from actual temperatures, resulting in frustration during cooking.
Moreover, the quality of the gauge itself also plays a role. Lower-quality gauges may not provide reliable readings, while high-quality models often feature more accurate sensors and superior construction, ensuring longevity and precision.
By understanding these factors, you can take proactive measures to ensure your gauge operates effectively and provides accurate readings throughout your smoking sessions.
The Significant Advantages of Utilizing a Smoker Temperature Gauge
Ensuring Consistent Cooking Results with Precision
One of the most significant benefits of using a smoker temperature gauge is the substantial improvement in cooking consistency. With precise temperature readings readily available, you can maintain optimal cooking conditions throughout the entire smoking process. This consistency is essential for achieving the ideal flavor profile and texture in your meats.
For instance, when smoking ribs, maintaining a steady temperature between 225°F and 250°F allows the meat to cook uniformly, rendering fat and collagen into tender, juicy bites. Without a reliable gauge, it’s easy to fluctuate between temperatures, leading to dry or undercooked meat that fails to impress.
Moreover, the ability to monitor temperatures throughout the cooking process provides greater control, helping you make necessary adjustments as needed. This translates to less guesswork and more dependable outcomes, whether you are a novice or an experienced pitmaster aiming to refine your skills.
Enhancing Food Safety Standards through Accurate Temperature Measurements
Using a smoker temperature gauge also plays a crucial role in improving food safety. Monitoring the internal temperature of meat ensures it reaches safe levels, thereby reducing the risk of foodborne illnesses. For example, poultry should be cooked to an internal temperature of at least 165°F, while pork and beef have their specific safe limits as well.
By employing a temperature gauge, you can verify that your meats reach these temperatures without needing to cut into them, which can lead to moisture loss and a less appealing final product. This is particularly important for larger cuts of meat, where assessing internal temperatures can be challenging without reliable tools.
Regularly checking the temperature also allows you to avoid the “danger zone” of 40°F to 140°F, where bacteria can proliferate, ensuring that your culinary creations are not only delicious but also safe for consumption.
Convenient Monitoring Solutions for Your Cooking Experience
A smoker temperature gauge provides unparalleled ease of monitoring during your cooking sessions. Instead of constantly lifting the smoker lid to check on the meat, which can lead to heat loss and extended cooking times, you can simply glance at your gauge to assess the temperature.
Digital gauges, in particular, often come equipped with features like remote monitoring and alarms that notify you when your smoker reaches a predetermined temperature. This convenience allows you to focus on other tasks, socialize with guests, or relax while your food cooks, all while maintaining confidence that you’re effectively managing your smoking game.
By utilizing a temperature gauge, you streamline your cooking process, resulting in a more enjoyable and less stressful smoking experience, regardless of your skill level.
Maintaining Your Smoker Temperature Gauge for Longevity and Precision
Essential Cleaning Practices for Optimal Performance
To keep your smoker temperature gauge functioning at its best, regular cleaning is essential. Over time, grease, soot, and other residues can accumulate, obstructing readings and negatively impacting performance. Start by using a soft cloth dampened with mild detergent to wipe down the gauge, ensuring you avoid abrasive cleaners that could scratch the surface.
For deeper cleaning, especially if the gauge has been exposed to heavy smoke, a mixture of vinegar and water works wonders. Soak a cloth in this solution and gently wipe the gauge, allowing it to penetrate any tough buildup. Rinse thoroughly with water to eliminate any cleaning agents.
After cleaning, ensure the gauge is completely dry before reattaching it to your smoker. Regular cleaning not only maintains the accuracy of your readings but also prolongs the gauge’s life, ensuring it remains a reliable tool for all your smoking endeavors.
Strategies for Protecting Your Gauge from Environmental Factors
Protecting your smoker’s temperature gauge from the elements is crucial for its longevity and optimal performance. Exposure to rain, snow, or extreme temperatures can damage the internal components of the gauge, leading to inaccurate readings or complete failure.
When your smoker is not in use, consider covering it with a protective tarp or investing in a smoker cover that shields it from moisture and UV rays. This simple precaution can prevent rust and corrosion, significantly extending the life of your gauge.
Additionally, if you’re using a digital gauge, removing it when the smoker is not in operation—especially if it’s portable—can protect it from potential damage. Store it in a cool, dry place to safeguard it against environmental factors. By implementing these preventive measures, you can ensure your gauge remains in excellent condition and ready for your next barbecue adventure.
Identifying When to Replace Your Smoker Temperature Gauge
Understanding when to replace your smoker temperature gauge is crucial for maintaining cooking quality. If you notice that your gauge consistently provides inaccurate readings, even after calibration, it may be time for a replacement.
Additionally, if the glass face becomes cracked or damaged, it compromises the gauge’s integrity and readability, necessitating a new purchase. Regular inspections are essential—if you find rust or corrosion on the gauge body that cannot be cleaned, it’s likely time for a replacement to ensure reliable performance.
Another sign that you need a new gauge is if it fails to respond quickly to temperature changes. A sluggish response time can lead to mismanagement of your smoking environment, resulting in unsatisfactory cooking results. By being proactive and replacing your gauge when necessary, you guarantee the best possible outcomes for all your grilling endeavors.
Your Most Frequently Asked Questions Answered for Clarity
How often should I calibrate my smoker temperature gauge?
It’s recommended to calibrate your smoker temperature gauge at least once per season or whenever you notice discrepancies in readings that could affect performance.
How do I know if my temperature gauge is accurate?
To test accuracy, compare your gauge’s readings with those of a reliable secondary thermometer, adjusting as necessary for any discrepancies identified during the comparison.
Can I use a digital thermometer for my smoker?
Yes, digital thermometers are excellent for smokers, providing precise readings and various features, such as alarms and remote monitoring capabilities, that enhance your cooking experience.
What should I do if my gauge is reading too high?
Check the gauge’s placement to ensure it’s positioned away from direct heat, recalibrate it if necessary, and consider the possibility of damage if issues persist.
How can I clean my smoker temperature gauge effectively?
Use a soft cloth dampened with mild detergent, or a vinegar-water solution for tougher residue, ensuring the gauge is dry before reinstalling it.
What type of temperature gauge is best for beginners?
Analog gauges are often recommended for beginners due to their simplicity and reliability; however, digital gauges are also user-friendly and provide accurate readings that facilitate the learning process.
Is it necessary to disconnect the gauge when not in use?
While not always necessary, removing a digital gauge can protect it from moisture and damage when the smoker is not in operation, prolonging its lifespan.
Can I install the gauge myself?
Absolutely! Installing a smoker temperature gauge is a straightforward process that can be completed with basic tools by following the manufacturer’s instructions closely.
What temperature should my smoker be set at for ribs?
For optimal results, set your smoker to maintain a temperature of about 225°F to 250°F when cooking ribs for the best flavor and tenderness.
How long does a smoker temperature gauge typically last?
With proper care and maintenance, a quality smoker temperature gauge can last several years. However, it’s essential to replace it if you notice inaccuracies or physical damage that could impact its performance.
Connect with us on Facebook for More Insights and Tips!
The Article How to Install a Smoker Temperature Gauge: A US Guide appeared first on https://pitmastersarsenal.com
The Article Install a Smoker Temperature Gauge: Your Essential US Guide Was Found On https://limitsofstrategy.com